Hey guys, long time lurker but thought I would drop by here and say hello. I posted a cheaper than dirt bitching thread but didn't want that to be my only thread on the board. I'm not a super hard-core prepper as much as a self-reliance advocate but really the only difference these days is what your motivation is. Oklahoma gives us plenty of reasons to be prepared for a weeks long emergency and the world is a constant reminder that the more you can depend on yourself/immediate community, the less you effected you will be if s really does htf.
So in the spirit of posting something more than a ***** session, I figured you guys might have an interest in this waste oil foundry I starting putting together. I've only run it a few times but the ability to cast your own metal has come in handy.
Basically, this foundry furnace is just an insulated vessel using some kind of shell (a small trashcan in my case) that is lined with some sort of refractory material that provides insulation/containment of the heat so it is concentrated into your working material. This is a crucible furnace which mean that a container called a crucible is used to hold the molten material that is later poured into some kind of mold (more on this later). A burner is built which injects atomized fuel with forced air into the furnace where it's combusted. These cool thing about this design is it's pretty rudimentary and as such, is pretty flexible. I've used just seasoned oak firewood to run this furnace and that gave me enough heat to melt a few pounds of aluminum without a problem. That means that in a limited resources scenario, this setup could be operable with a little electricity or potentially with a bellows and allow you to make hard parts from the large amount of scrap sure to be laying around.
The refractory is made from a bag of fireclay I got from a pottery shop here in OKC. It was mixes in equal part by volume of peralite which any big box will have. This refractory isn't going to live forever at iron melting temps but should be very acceptable at aluminum or even brass/bronze temps. Over that, it will begin to vitrify (melt and turn to glass). I haven't tried using some good ol Oklahoma red clay but we have some really good hard clay deposits on our land that I might try out at some point.
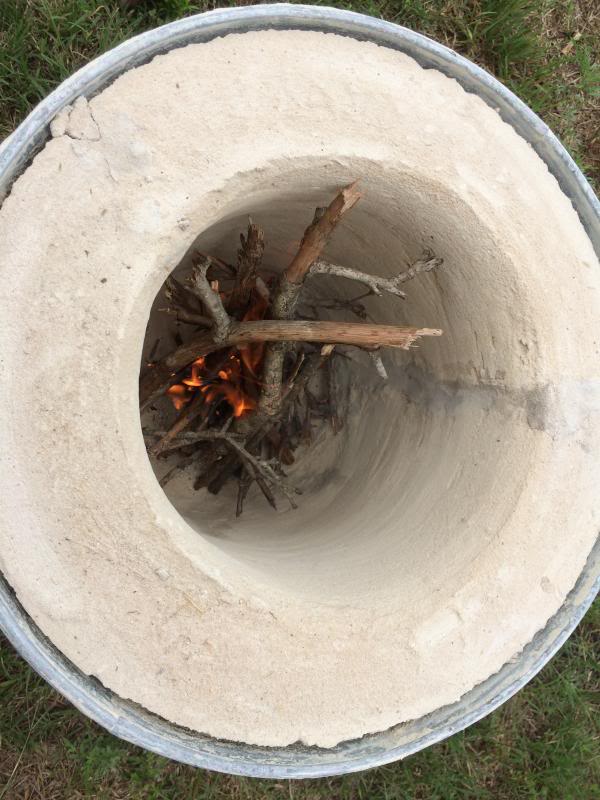
Here is a picture of the bottom. I just used a galvanized trash can as a shell (nothing at all critical about this) and used a nitrous bottle as a form for the inner chamber. That got me plenty of room for a starter furnace and still left me a reasonable amount of thickness in the refractory to insulate things.

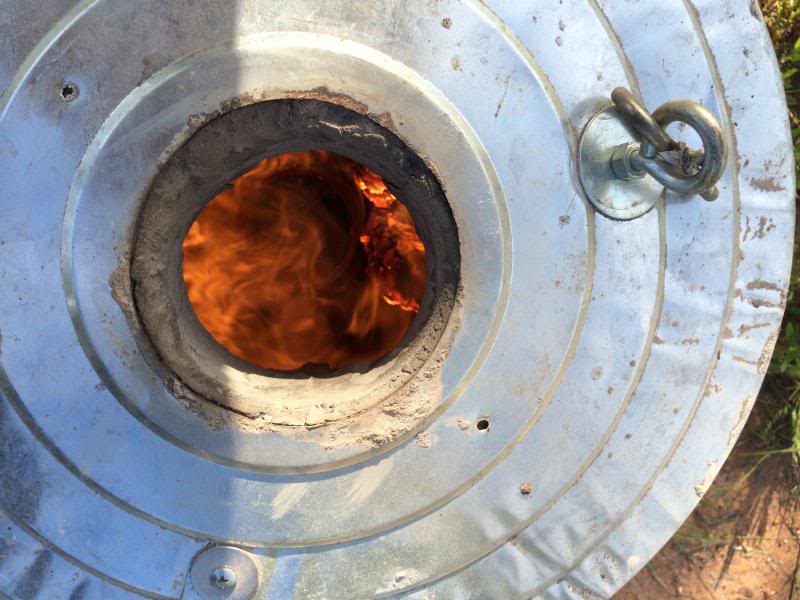
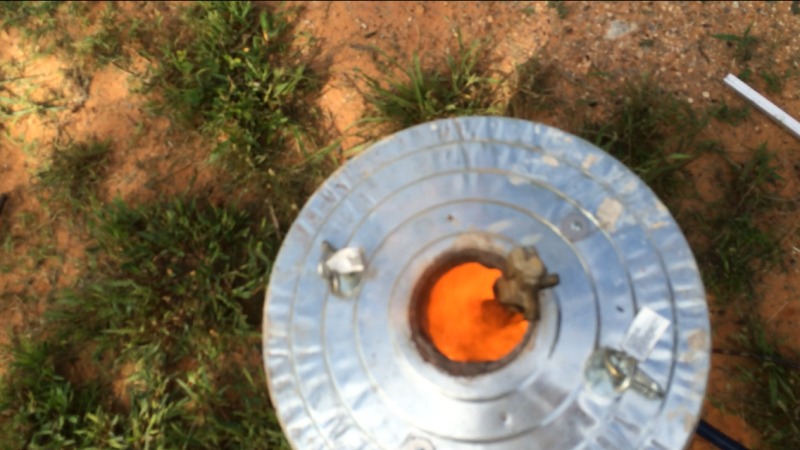
I don't have a good one of the top but just picture the lid with about 3 inches of clay refractory stuck to the bottom. To help hold the refractory in place, I used some screws with tig rod tacked to form a spider web to help hold the refractory in in place. The hole in the center allows the gas to escape and provides access to drop additional material into the crucible. From the pic below, you can see an old fuel rail sticking out that was allows to slowly melt down into the crucible.


The meat and potatoes of the whole setup is the burner. If you decide to build one of these, you will undoubtedly spend some time on google looking into other's projects. If you are less concerned about oil and are ok with spending the money on propane, you can build a very simple and very effective burner that can give you all the heat you want. I wanted to recycle material and not be tied to a gaseous fuel so I choose an oil burner route. Oil has tons of energy and a couple oil changes here and there will provide you with all the heat a beginner foundry would need. Plus, liquid fuels based burners can be easily adapted to run on kerosene, diesel, waste oil, etc.
There are a million and one designs for oil burners and like many from scratch builds, my experience is that there is a lot of overthinking that goes into them. I've seen folks building preburn chambers, and compressed air atomizers, or adapted oil furnace but in the testing I've done most of it is either unnecessary or unsupportable in a limited resources scenario. Key point to remember with burners is that their only job is to ensure that they put enough fuel and air into the burn chamber to get the heat you need. Most of the above are attempts to solve the problem of getting a good complete burn by either atomization or vaporization. A preburn chamber is wastes a lot of heat and is complex to design and build. I've seen some very good atomizers built but most run on compressed air which required a ton of electricity. Most successful and simple oil burners use some sort of preheat process by starting with propane to get the chamber over the flash temp for oil. I've been using wood to preheat the chamber since it's plentiful and keeps the burner assembly dead simple.
My burner is little more than a throw away 12 volt AIR pump that came off 4th gen camaro. It's one of the first things people ditch when mods begin but I kept it as it's a pretty powerful little fan and eats about 48 watts to run. I JB welded a scrap steel tube in the end to give about 18 inches of space to keep the heat away from the fan. As it turns out, this was unneeded. For fuel injection, I just built a gravity/siphon feed and used 1/8th in brass fittings. The velocity across the nozzle is high enough to break the oil into a course mist. The air/fuel mixture at speed pulls in extra air. On starting, the finer mist particles will burn in the air and the more course particles will land on the wood and burn there. After a while, the whole furnace is self-sustaining on oil since the internal temps are high enough to flash the oil to vapor and ignite it. Here is a little video of it running.
So this is a cool and dangerous toy which is awesome but what do you do with it? If you guys are interested, I'll post more about pattern making, how to make green sand for molding, and show what a melt and pour looks like.
So in the spirit of posting something more than a ***** session, I figured you guys might have an interest in this waste oil foundry I starting putting together. I've only run it a few times but the ability to cast your own metal has come in handy.
Basically, this foundry furnace is just an insulated vessel using some kind of shell (a small trashcan in my case) that is lined with some sort of refractory material that provides insulation/containment of the heat so it is concentrated into your working material. This is a crucible furnace which mean that a container called a crucible is used to hold the molten material that is later poured into some kind of mold (more on this later). A burner is built which injects atomized fuel with forced air into the furnace where it's combusted. These cool thing about this design is it's pretty rudimentary and as such, is pretty flexible. I've used just seasoned oak firewood to run this furnace and that gave me enough heat to melt a few pounds of aluminum without a problem. That means that in a limited resources scenario, this setup could be operable with a little electricity or potentially with a bellows and allow you to make hard parts from the large amount of scrap sure to be laying around.
The refractory is made from a bag of fireclay I got from a pottery shop here in OKC. It was mixes in equal part by volume of peralite which any big box will have. This refractory isn't going to live forever at iron melting temps but should be very acceptable at aluminum or even brass/bronze temps. Over that, it will begin to vitrify (melt and turn to glass). I haven't tried using some good ol Oklahoma red clay but we have some really good hard clay deposits on our land that I might try out at some point.
Here is a picture of the bottom. I just used a galvanized trash can as a shell (nothing at all critical about this) and used a nitrous bottle as a form for the inner chamber. That got me plenty of room for a starter furnace and still left me a reasonable amount of thickness in the refractory to insulate things.

I don't have a good one of the top but just picture the lid with about 3 inches of clay refractory stuck to the bottom. To help hold the refractory in place, I used some screws with tig rod tacked to form a spider web to help hold the refractory in in place. The hole in the center allows the gas to escape and provides access to drop additional material into the crucible. From the pic below, you can see an old fuel rail sticking out that was allows to slowly melt down into the crucible.


The meat and potatoes of the whole setup is the burner. If you decide to build one of these, you will undoubtedly spend some time on google looking into other's projects. If you are less concerned about oil and are ok with spending the money on propane, you can build a very simple and very effective burner that can give you all the heat you want. I wanted to recycle material and not be tied to a gaseous fuel so I choose an oil burner route. Oil has tons of energy and a couple oil changes here and there will provide you with all the heat a beginner foundry would need. Plus, liquid fuels based burners can be easily adapted to run on kerosene, diesel, waste oil, etc.
There are a million and one designs for oil burners and like many from scratch builds, my experience is that there is a lot of overthinking that goes into them. I've seen folks building preburn chambers, and compressed air atomizers, or adapted oil furnace but in the testing I've done most of it is either unnecessary or unsupportable in a limited resources scenario. Key point to remember with burners is that their only job is to ensure that they put enough fuel and air into the burn chamber to get the heat you need. Most of the above are attempts to solve the problem of getting a good complete burn by either atomization or vaporization. A preburn chamber is wastes a lot of heat and is complex to design and build. I've seen some very good atomizers built but most run on compressed air which required a ton of electricity. Most successful and simple oil burners use some sort of preheat process by starting with propane to get the chamber over the flash temp for oil. I've been using wood to preheat the chamber since it's plentiful and keeps the burner assembly dead simple.
My burner is little more than a throw away 12 volt AIR pump that came off 4th gen camaro. It's one of the first things people ditch when mods begin but I kept it as it's a pretty powerful little fan and eats about 48 watts to run. I JB welded a scrap steel tube in the end to give about 18 inches of space to keep the heat away from the fan. As it turns out, this was unneeded. For fuel injection, I just built a gravity/siphon feed and used 1/8th in brass fittings. The velocity across the nozzle is high enough to break the oil into a course mist. The air/fuel mixture at speed pulls in extra air. On starting, the finer mist particles will burn in the air and the more course particles will land on the wood and burn there. After a while, the whole furnace is self-sustaining on oil since the internal temps are high enough to flash the oil to vapor and ignite it. Here is a little video of it running.
So this is a cool and dangerous toy which is awesome but what do you do with it? If you guys are interested, I'll post more about pattern making, how to make green sand for molding, and show what a melt and pour looks like.
Last edited by a moderator:


