Archers Ghillie

This site may earn a commission from merchant affiliate links, including eBay, Amazon, and others.

Droberts

Sharpshooter
Special Hen
Joined
Aug 26, 2010
Messages
422
Reaction score
0
Location
Edmond
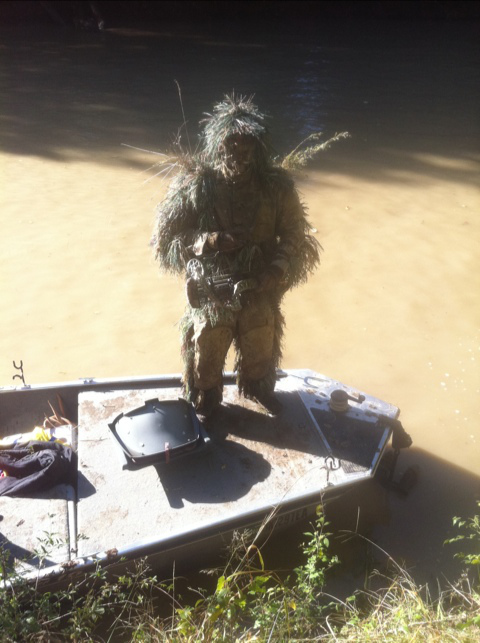
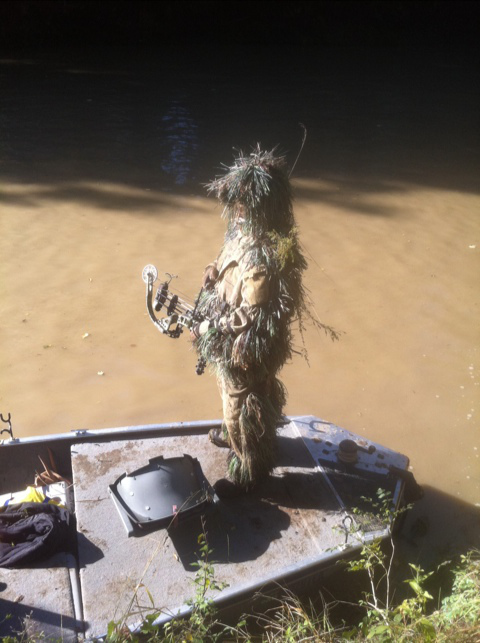
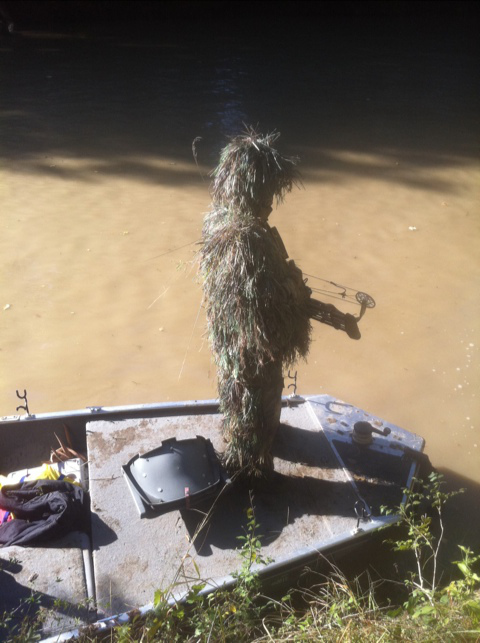
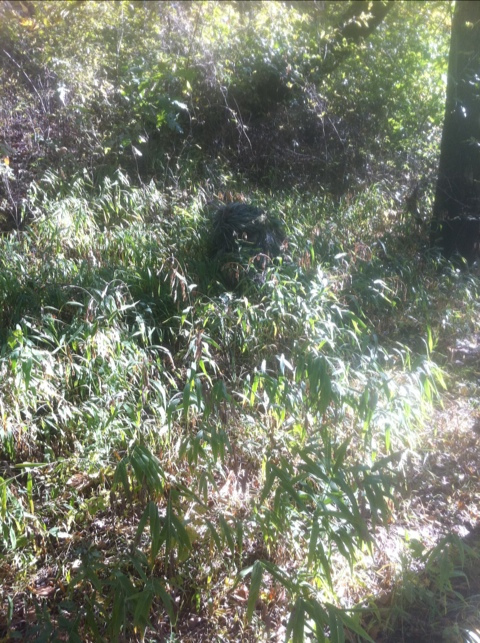
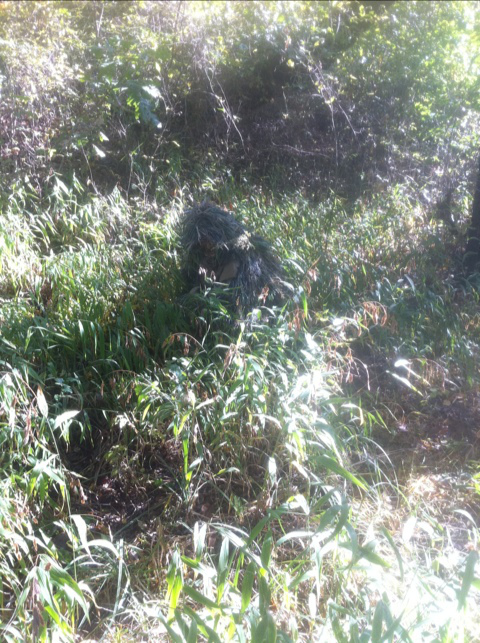
This one's for all the archers out there. Original post on my website.


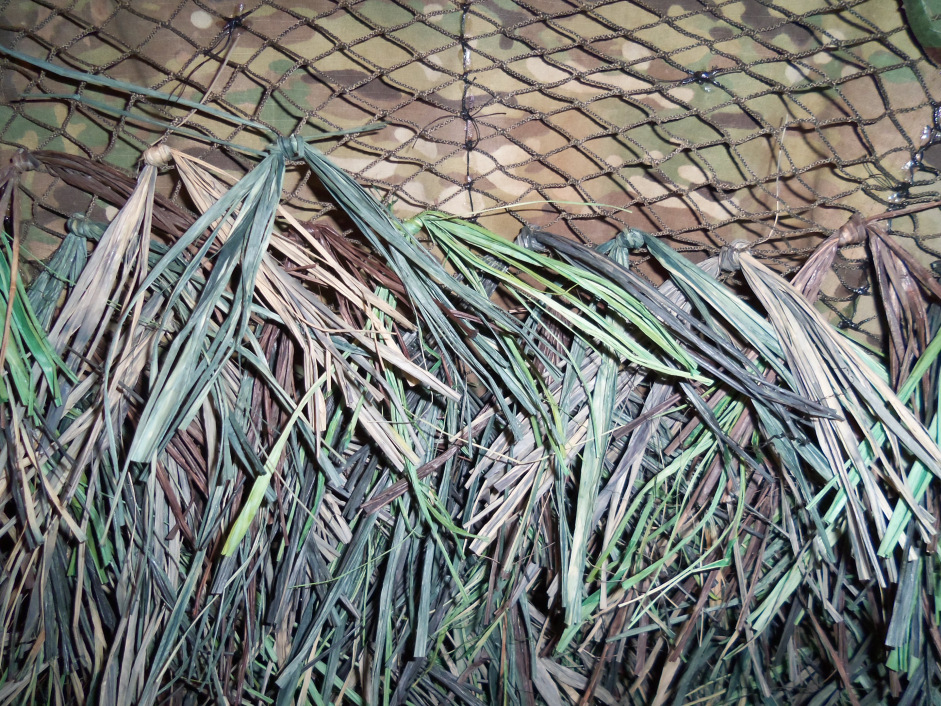
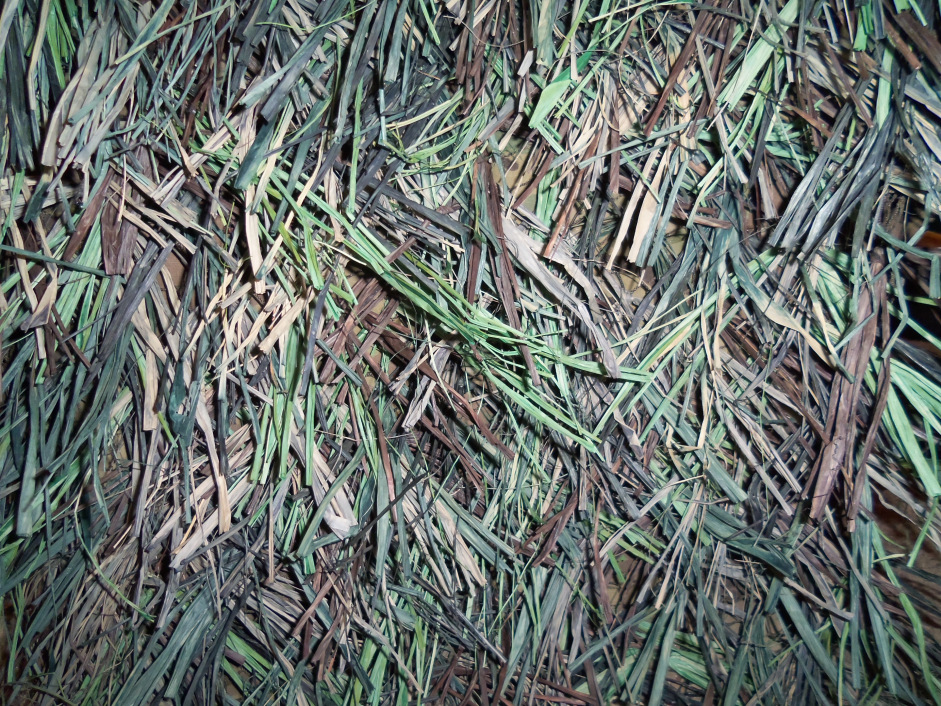
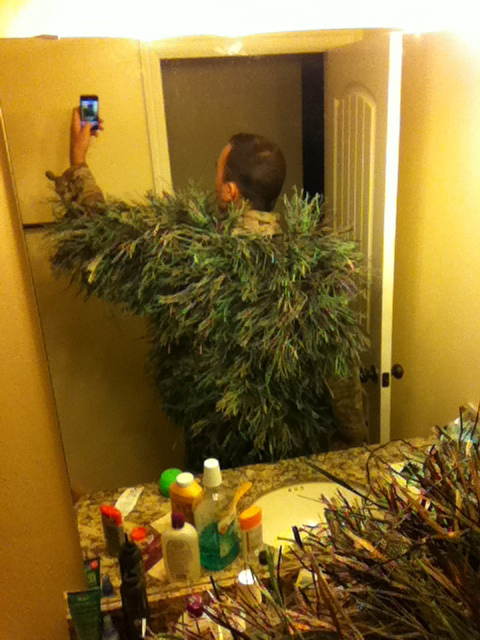
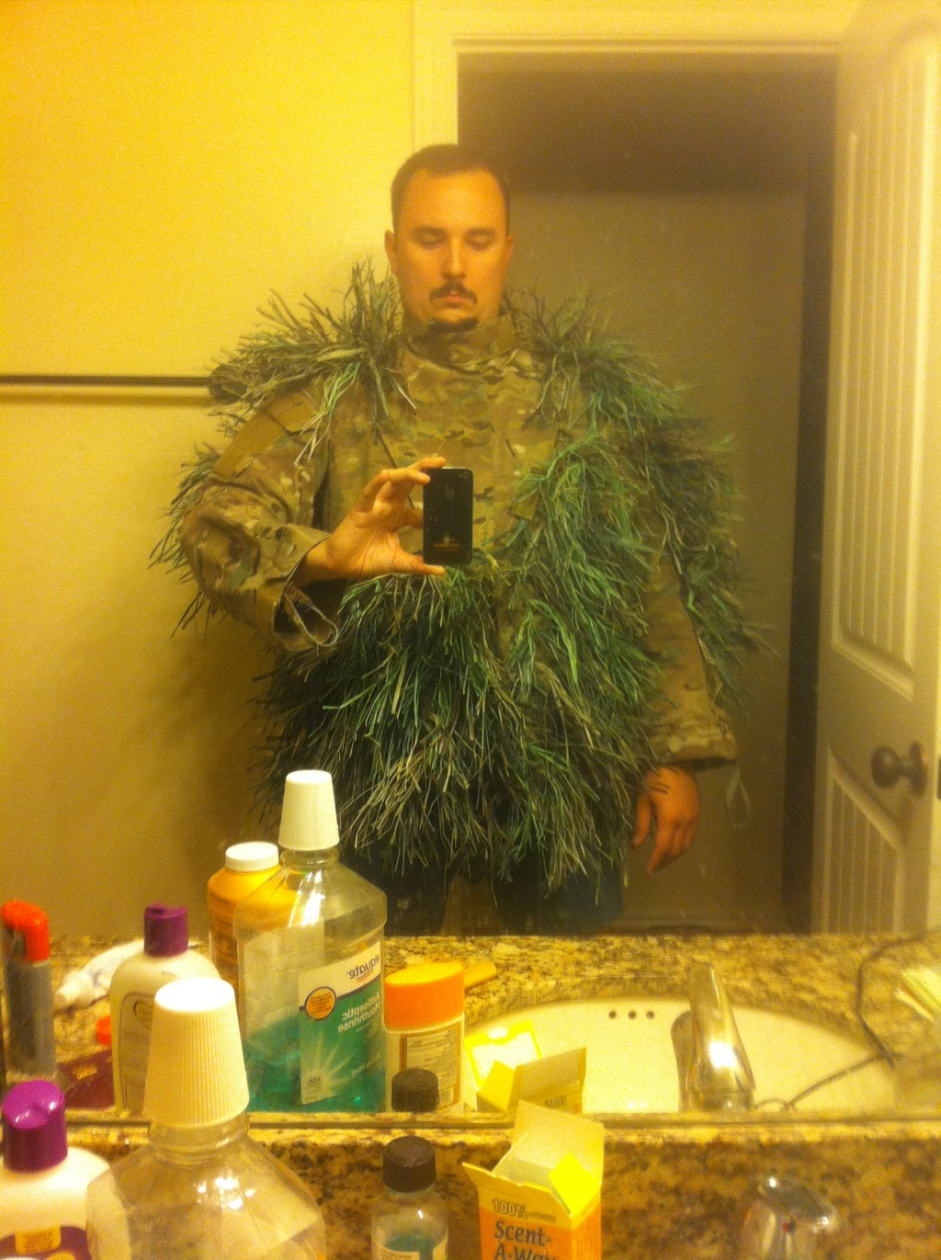
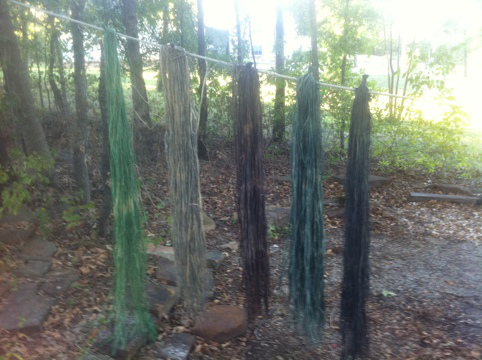
To build a durable ghillie you must use durable materials. Pictured here is palm tree raffia from Madagascar purchased from Hobby Lobby as “Madagascar Grass.”
Each hanging color you see here comes in a bag for $5. The dye packs are $2 each and can dye about 5 times the amount shown here. The salt cans (2) cost
about $3 each. Be sure to hose down the raffia right after hanging it up before it dries out.
dproberts.files.wordpress.com_2012_09_20120918_083926.jpg_7d52d3682465204d63442cc3aba4bc63.jpg


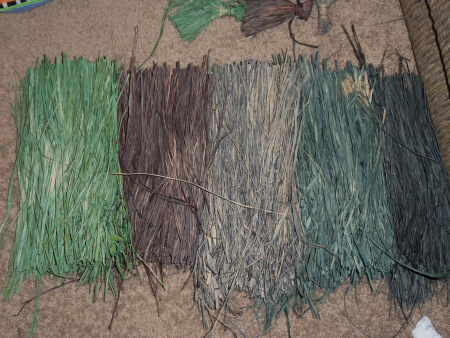
After allowing the raffia to completely dry using a pair of shears the grass is easily cut into manageable piles for later use. I wrap the piles individually with a
couple rubber bands when not in use.
dproberts.files.wordpress.com_2012_10_100_0360.jpg_dbb8cefc26f277e6c005c71c9707dfc8.jpg


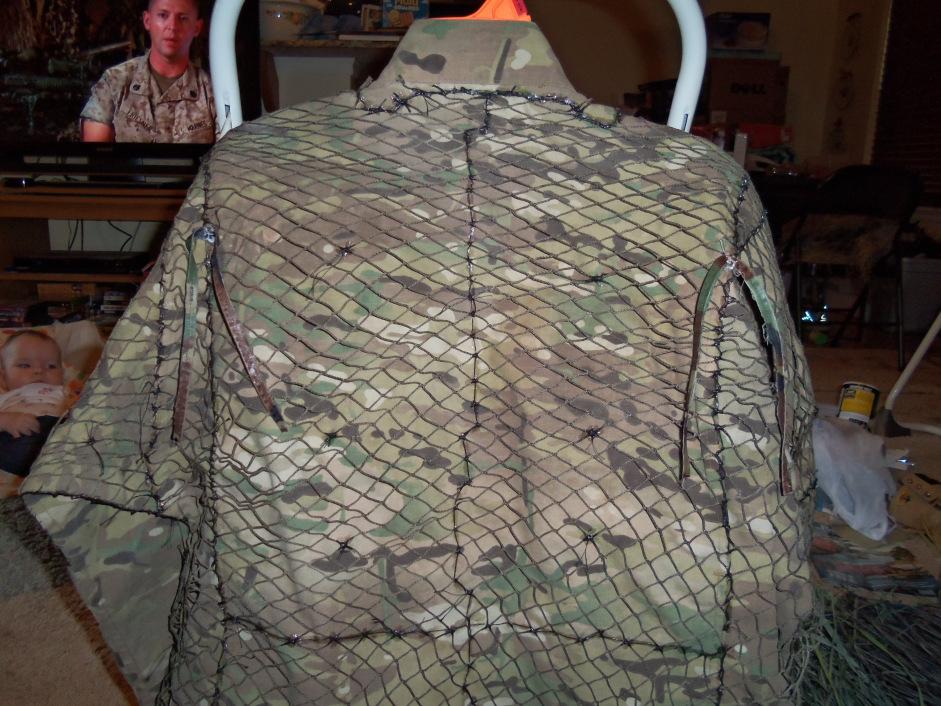
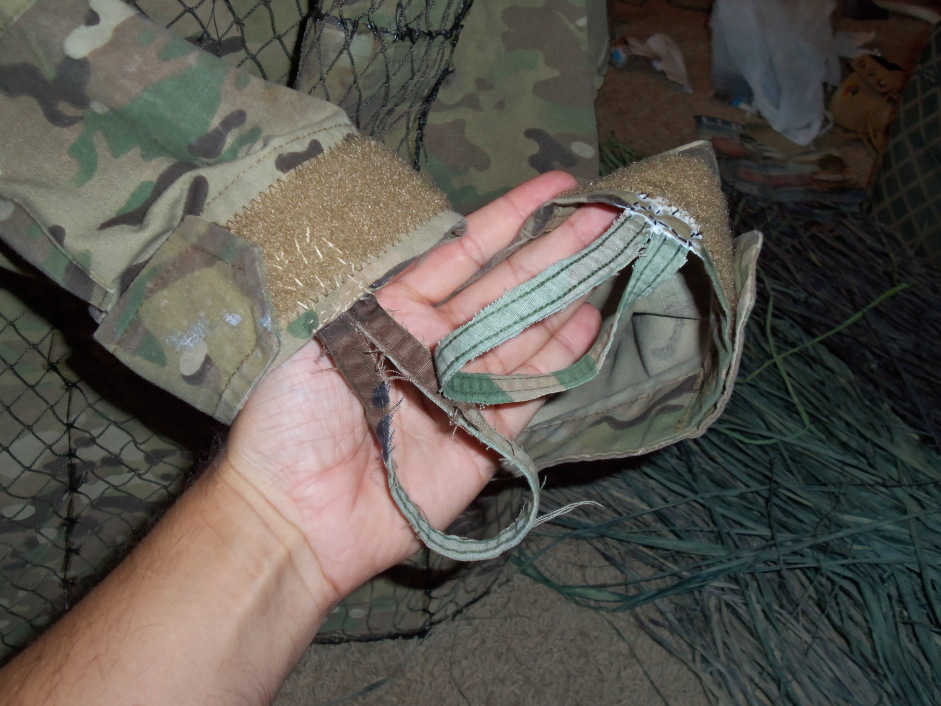
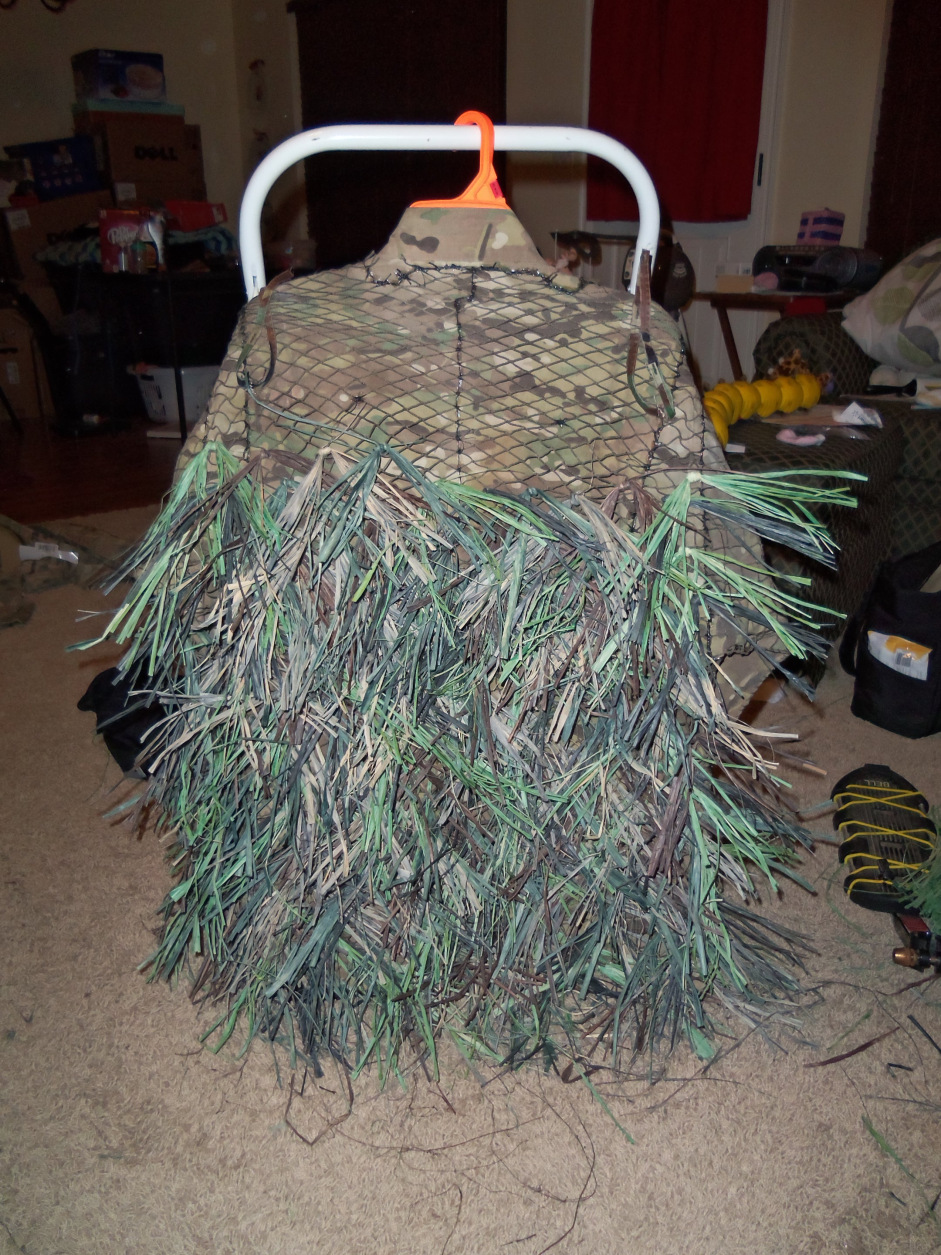
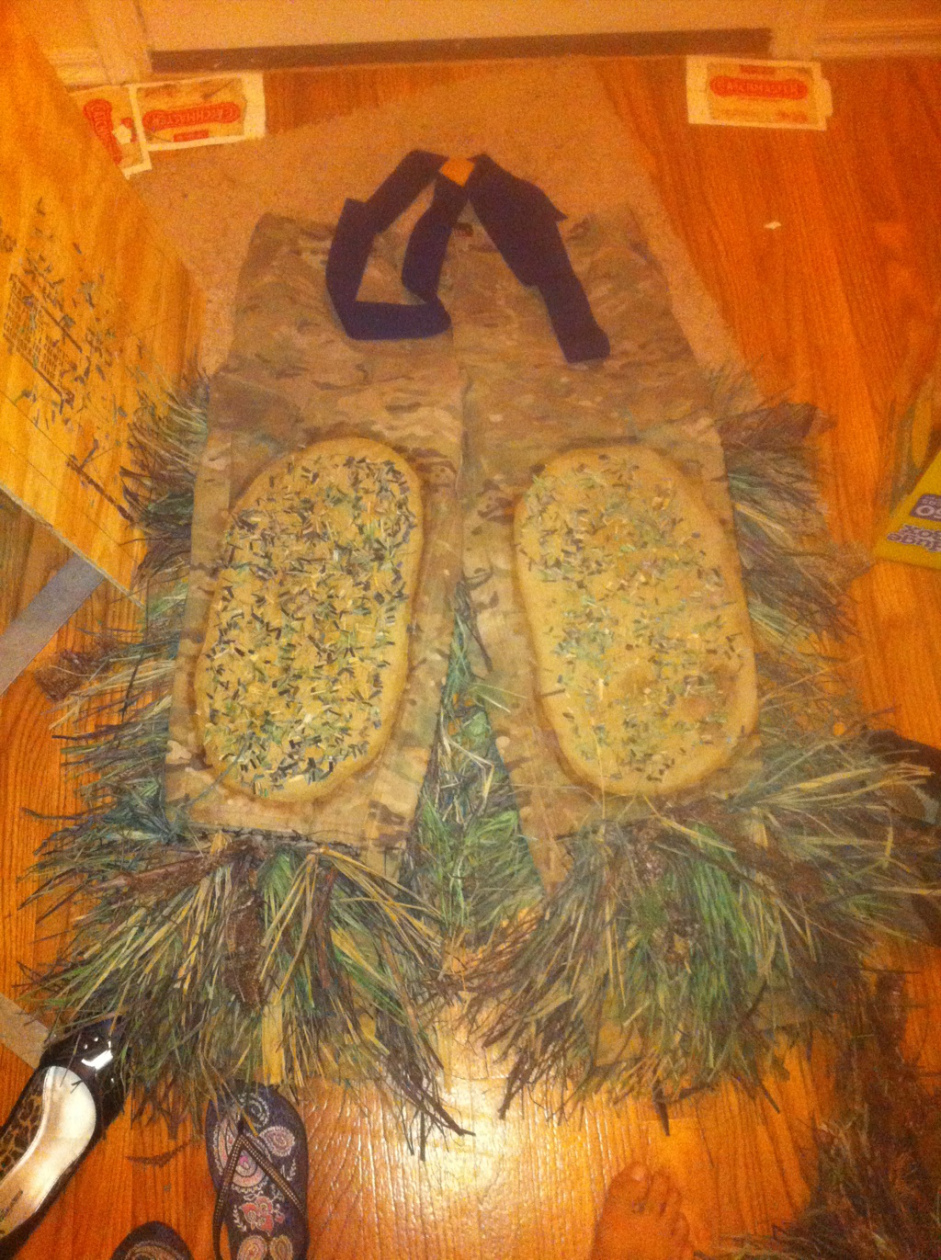
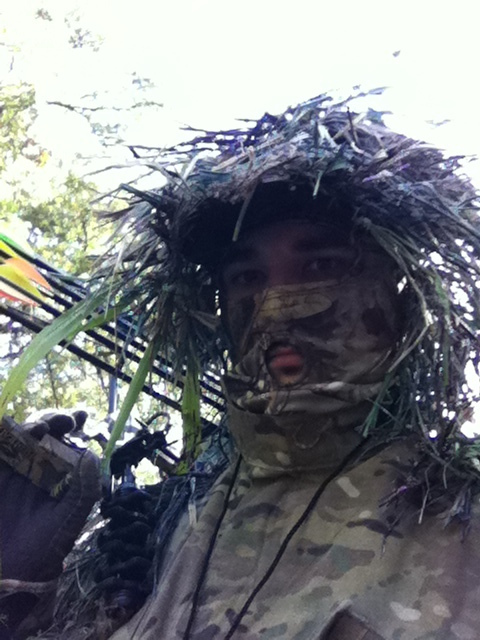
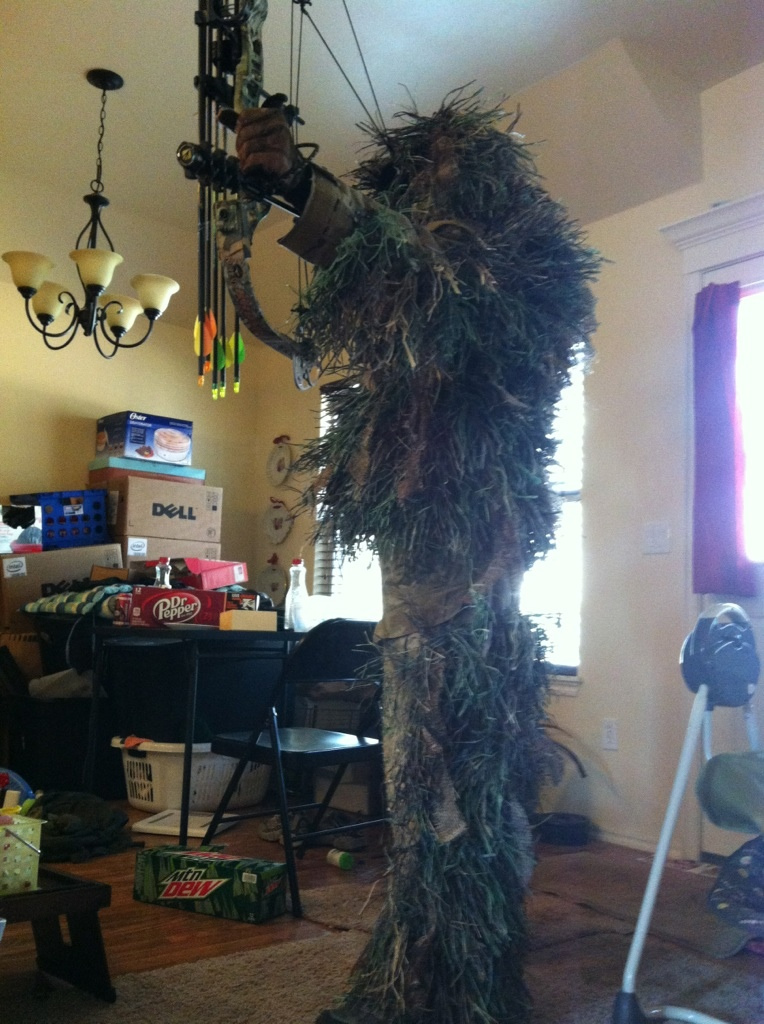
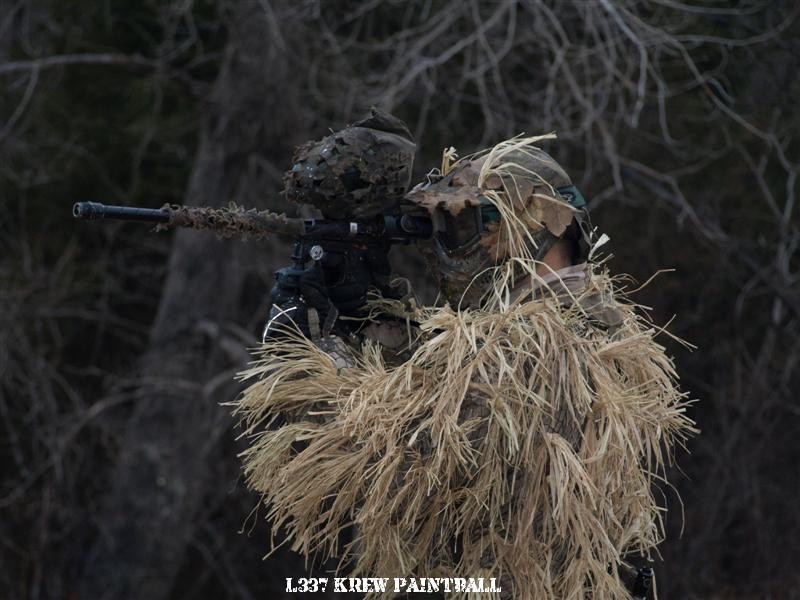
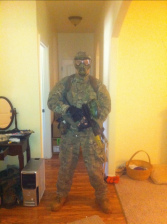
The BDU of choice is a high quality multicam with a velcro neck collar. The collar greatly helps with holding down the camo mask, shown later. The pants/jacket
shown here were purchased at an army surplus store for about $60 each.
dproberts.files.wordpress.com_2012_10_20121015_093435.jpg_b5dd9b37ffef243ae473979c313e6fbf.jpg


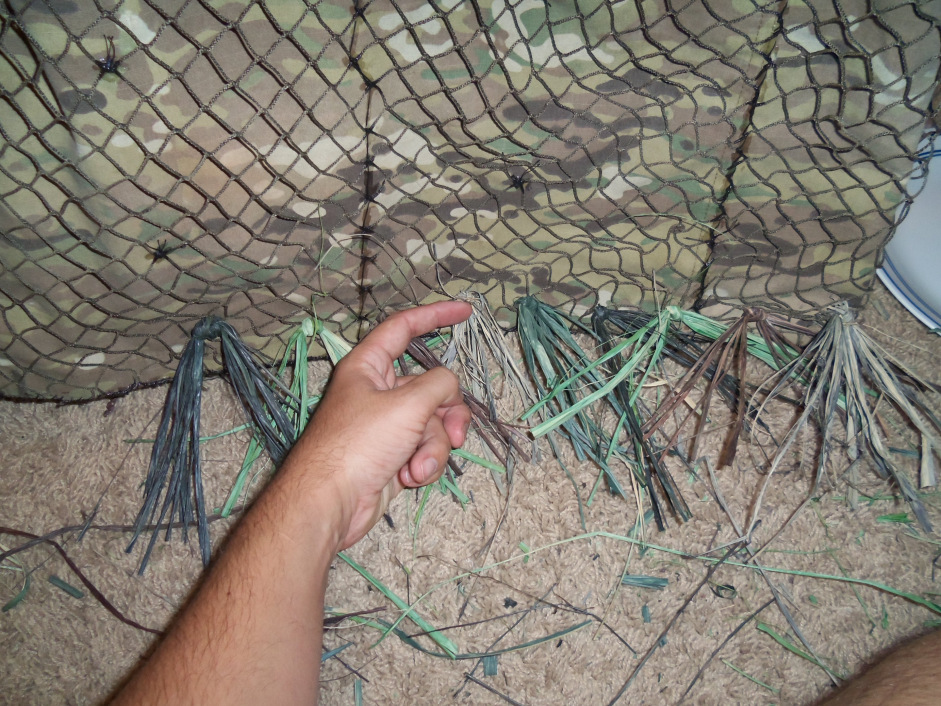
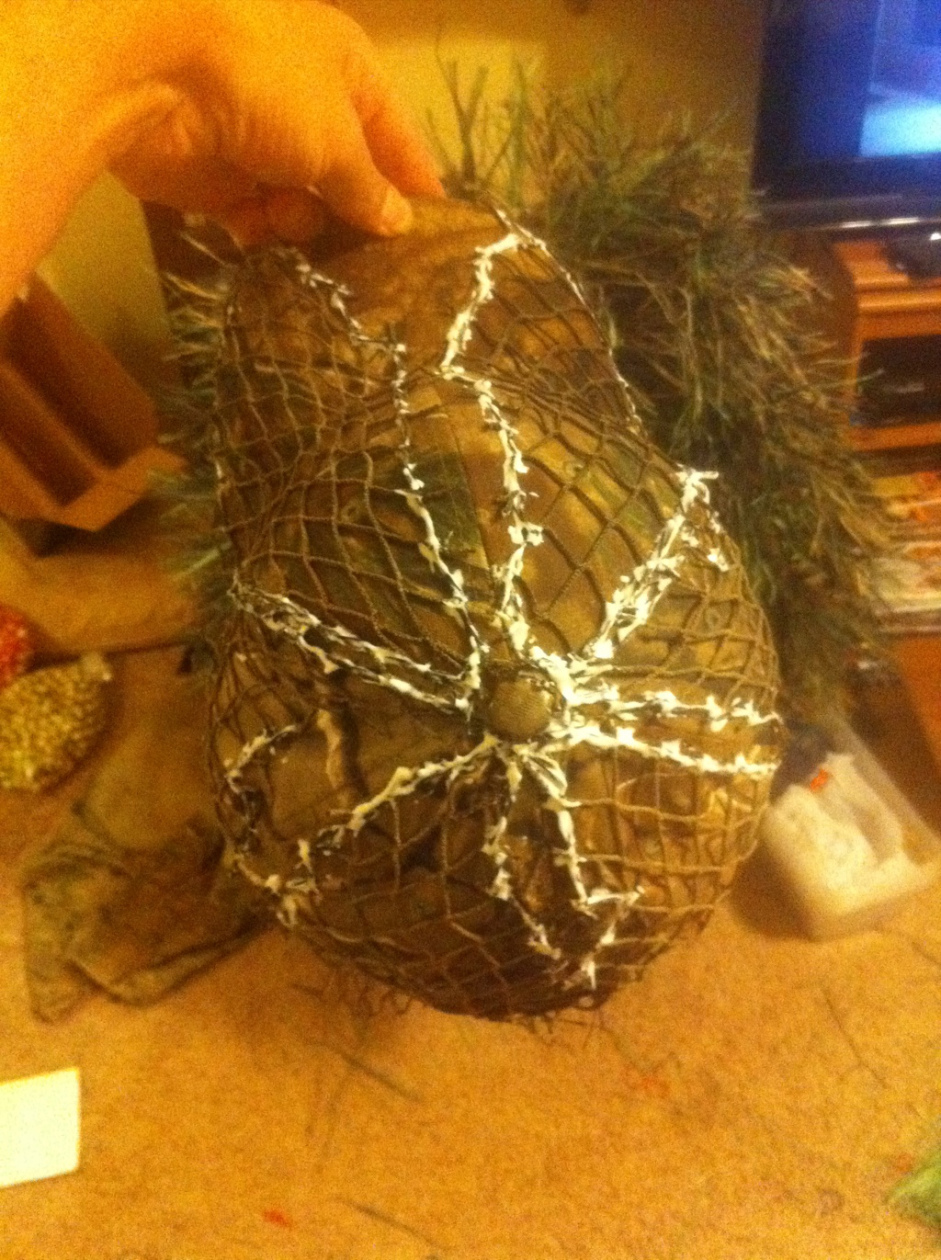
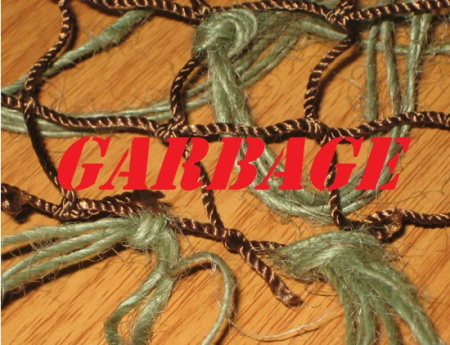
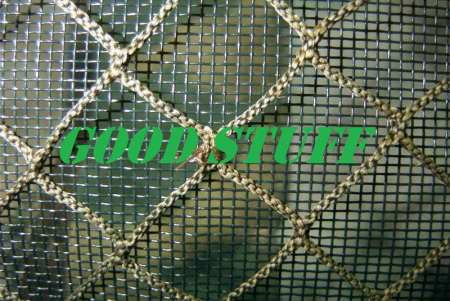
Many websites sell ghillie netting and ghillie kits with cheap netting prone to fray and rott. You can easily spot the garbage from the good stuff – the garbage
looks like plain nylon twine tied together to form a net.It is soft and flimsy when handled.
dproberts.files.wordpress.com_2012_10_ghillieknots1.jpg_c5267eea8fc3c2477bde64e5c260d956.jpg


The good stuff is UV, abrasion & rott resistant interwoven nylon. Its strong, and has a life span longer than the BDU’s you sew it to.It is stiff and not flimsy
when handled.
dproberts.files.wordpress.com_2012_10_net_mosquito_cup.jpg_2227290a0be7bb7888ee4b17219d6ca0.jpg


A lot of people suggest using dental floss to sew with, but in my experience it is a poor choice. Unwaxed dental floss is very prone to abrasion and fray.
It doesn't last very long even when glued. Waxed floss doesn't absorb the glue and ends up with very poor adhesion. Don’t even think about heavy
fishing line.Having tried various things nothing stands up to the test of time and abuse like heavyweight nylon upholstery thread. It is abrasion, UV, mildew
& moisture resistant. It also adheres to glue like a champ.
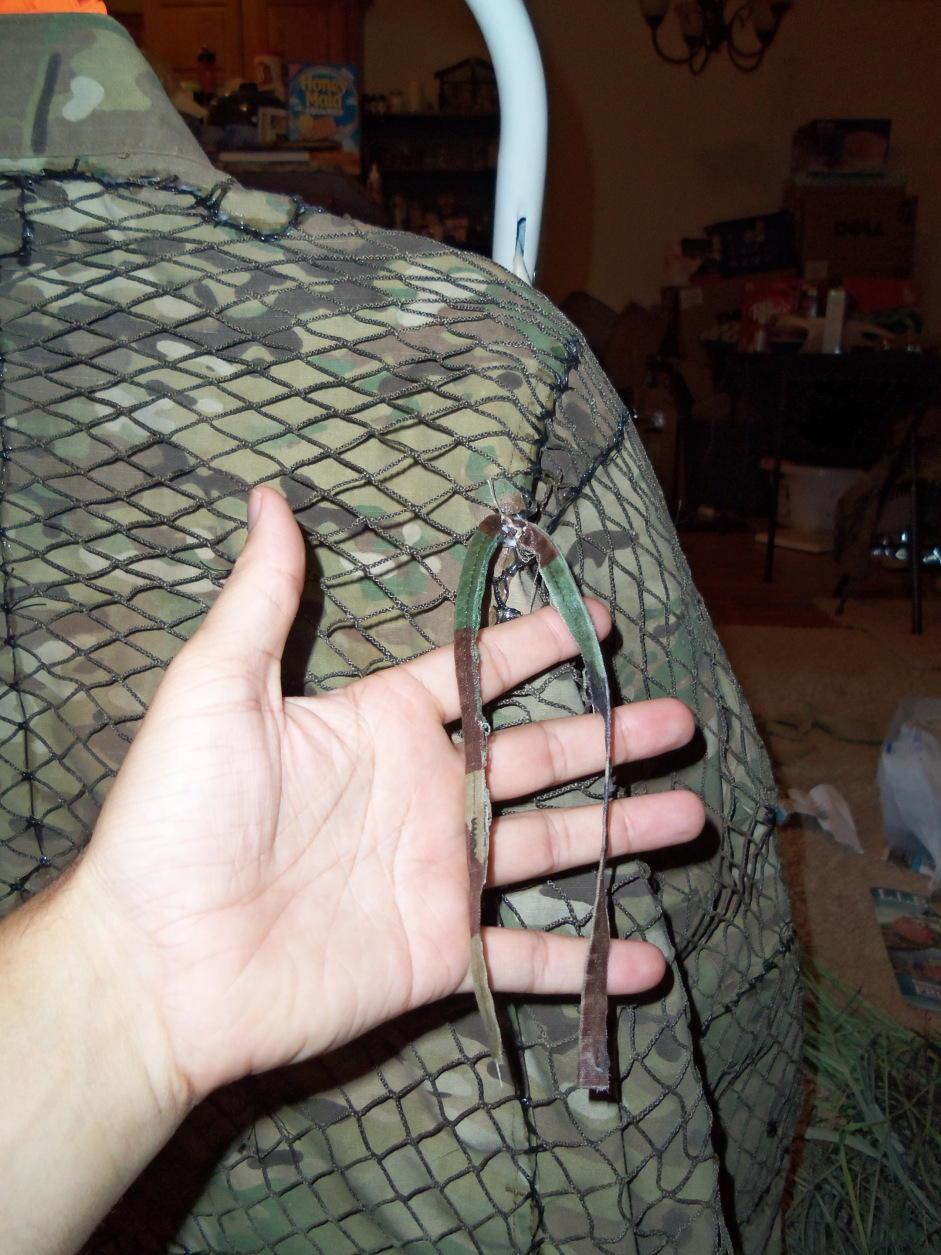
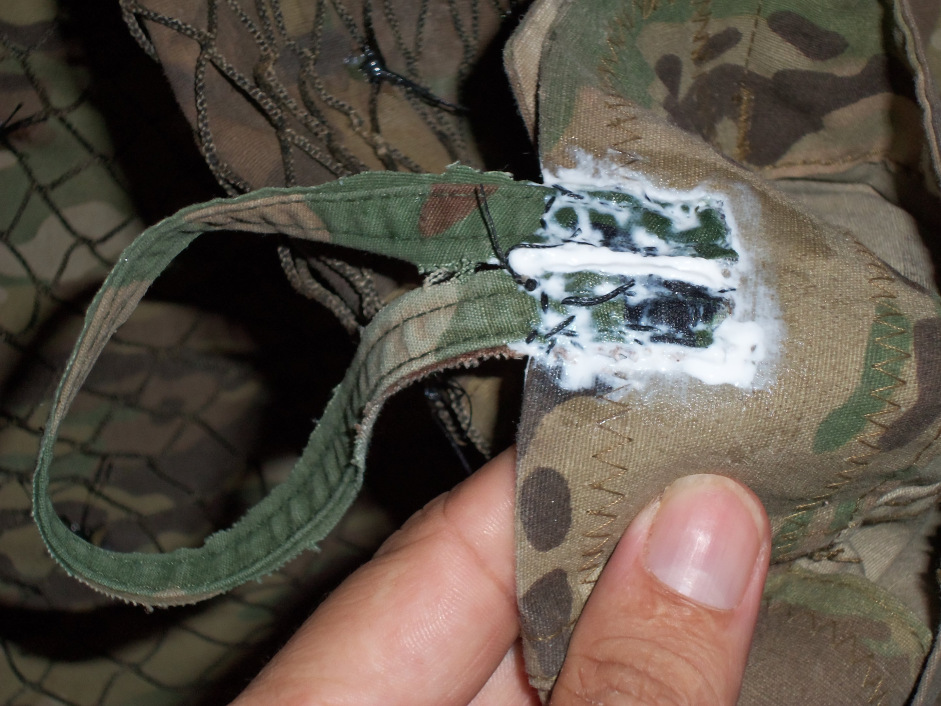
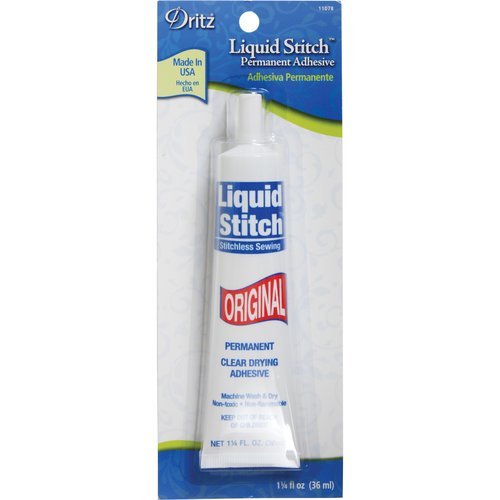
dproberts.files.wordpress.com_2012_10_s964_900_1.jpg_7d52d3682465204d63442cc3aba4bc63.jpg


I’ve tried several different types of glues, shoe glue, Goop, rubber cement, and various fabric glues. A product called Liquid Stitch is by far the reining
champ. It can be used indoors, doesn’t give off any nasty fumes and adhere’s fantastically to threads and fabrics. It’s also very flexible when it dries
and can be used to “rubberize” portions of a ghillie that need extra durability (thumb loops, tie straps). Cost $6 per tube, usually requiring 4-5 tubes
per suit.
dproberts.files.wordpress.com_2012_10_0007287925265_500x500.jpg_7d52d3682465204d63442cc3aba4bc63.jpg


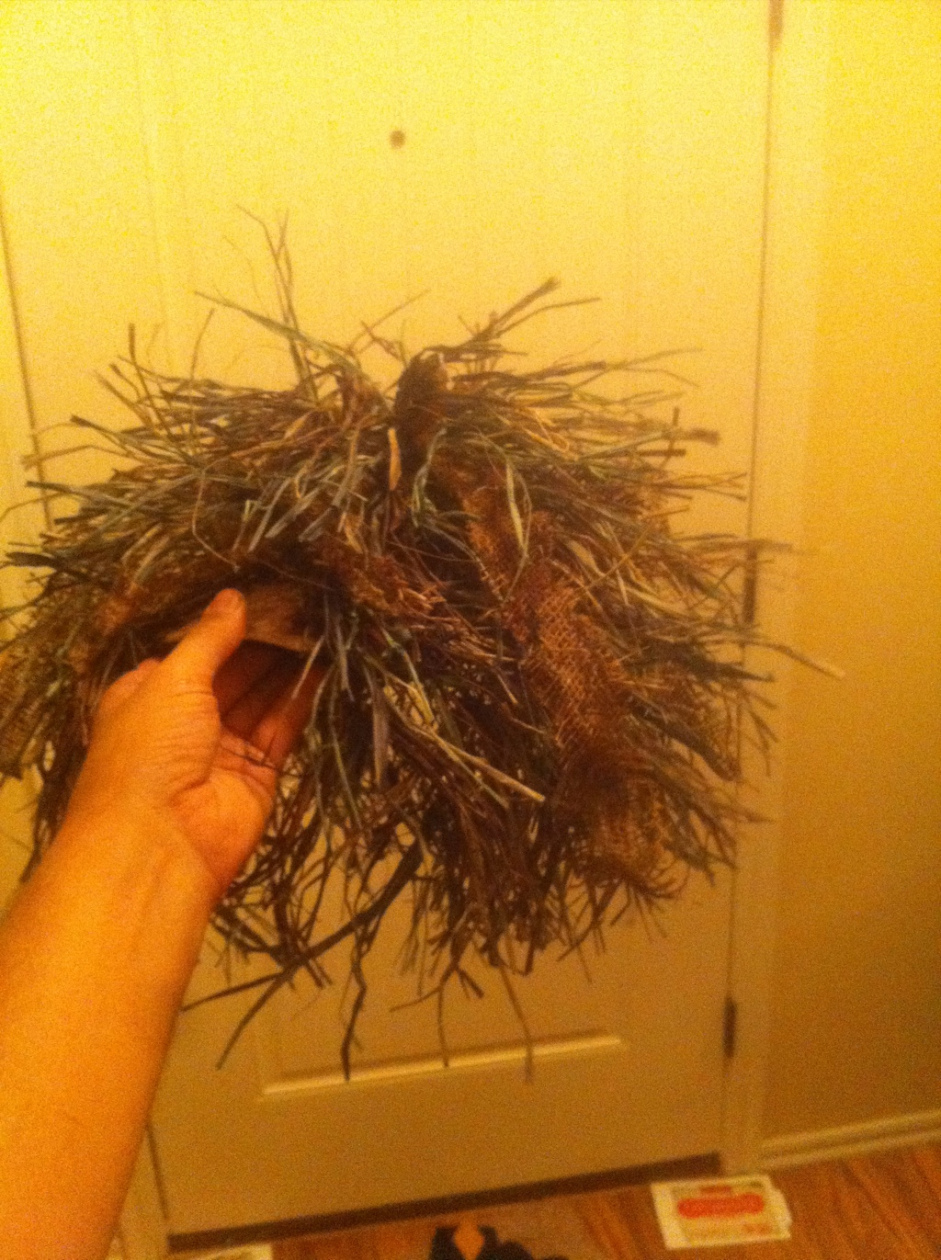
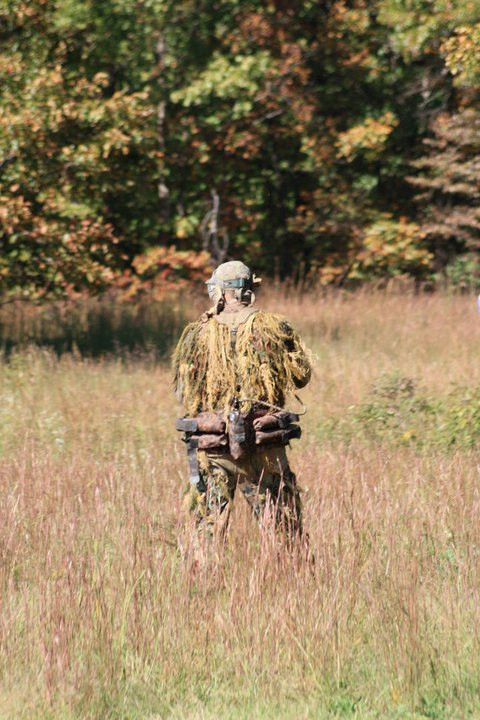
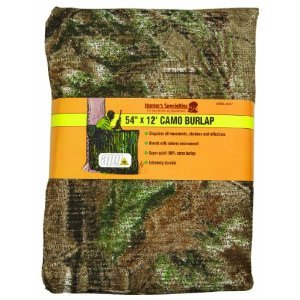
I use about 90% palm raffia and about 10% burlap strips. Walmart, Academy & pretty much any sporting goods store sells pre-dyed camo burlap
hunting blinds. Simply unfold it a bit and cut long strips out 5 at a time to mass produce strips. Cost $15.
dproberts.files.wordpress.com_2012_10_61nw0a7dpl__sl500_aa300_5e7b10ebef376ccd4811103bfc6fc066.jpg
 

Droberts

Sharpshooter
Special Hen
Joined
Aug 26, 2010
Messages
422
Reaction score
0
Location
Edmond
Start the building process by laying your netting down on the floor stretched semi-tight and anchored down with some dumbbells or something heavy. Lay out your pants and jacket & safety pin them in place. Cut out the netting to form fit your suit as you see fit; full body for the traditional ‘walking bush’, rear only for the traditional crawl suit, or, like this build, an archery specific cutout.Once the netting patterns are completely cut out, fold the netting over the pants and jacket & safety pin them in place. It will take a long time to sew all the netting in place and the pins will keep the netting aligned while you sew.Start by sewing the perimeter or the netting to the BDU fabric. Put stitches into every single inch of that netting perimeter anchor it down good. Once you have that done sew across large open areas of the netting and make several spot stitches within the smaller areas. The idea is to keep the netting secure but not too tied down to the fabric. You need to leave room to tie on the ghillie material. Apply a good amount of liquid stitch to all visible thread.
dproberts.files.wordpress.com_2012_10_100_0344.jpg_a89c26beabdd306420655336ddab1cff.jpg


In the picture I have attached tie down strands and rubberized them with Liquid Stitch, as mentioned above.Note the stitching on the shoulder leaves a little extra netting in the pleat gaps as well as runs along the strong seams of the jacket.
dproberts.files.wordpress.com_2012_10_100_0345.jpg_170e4a64075508d1252aea047af6cce9.jpg


Stitch your thumb loops to the sleeves and apply a thick coating of Liquid Stitch to both the stitching and the loops themselves. You’ll need to get your fingers dirty to really rub in the glue but it’ll pay off. The loops will gain tremendous durability by the “rubberization” process.Word of advice – don’t get any glue on the hairs of your arms or legs.. Trying to remove it results in lots of pain.
dproberts.files.wordpress.com_2012_10_100_0350.jpg_a89c26beabdd306420655336ddab1cff.jpg


One completed thumb loop (right) & one awaiting gluing (left).
dproberts.files.wordpress.com_2012_10_100_0351.jpg_a89c26beabdd306420655336ddab1cff.jpg


Starting from the bottom of the jacket, begin attaching the dyed raffia. I have found that an index finger knuckle to fingernail is about the perfect length for spacing. You can mix up the pattern any way you wish, but my personal preference is to go with a perfect balanced mix using a color rotation as I attach the raffia.After each cluster of strands is tied I bend them down into a V so that they overlap with their neighbor strands.
dproberts.files.wordpress.com_2012_10_100_0362.jpg_a89c26beabdd306420655336ddab1cff.jpg


The vertical spacing depends on how long your strands are. The need to be far enough away that they don’t bunch up, but close enough to overlap with the previous layer.Note – “Madagascar Grass” as Hobby Lobby calls it is very tough stuff. It looks like a cactus at first but after a about a weeks worth of trampling through the woods it will be properly conditioned & quite a bit more frayed than you see in these pictures. The ends of the raffia split and tear forming a much greater camouflage texture.
dproberts.files.wordpress.com_2012_10_100_0370.jpg_a89c26beabdd306420655336ddab1cff.jpg


Properly tied down ghillie leaves very little of the original jacket fabric still visible. Not pictured here is the burlap, added later in random places about 10 inches apart, it really gives the suit a perfecting look. By attaching the ghillie in intentionally spaced overlapping rows you leave room to lift up a section & tie in additional material as you see fit – burlap strips, un-dyed raffia for the dead of winter, etc.
dproberts.files.wordpress.com_2012_10_100_0371.jpg_a89c26beabdd306420655336ddab1cff.jpg


Continue up the jacket until you reach the neck & begin on the arms & front.
dproberts.files.wordpress.com_2012_10_100_0369.jpg_170e4a64075508d1252aea047af6cce9.jpg


Once all the raffia is on tie on a few strips of burlap here & there. Don’t worry about pre-fraying it, it’ll break up REAL fast when you start moving around in the trees.In this picture the ghillie around the neck has not been trimmed yet. Depending on your choice of head covering you may want to leave or trim around the neck line. For this ghillie I chose to make a ball cap cover out of a fully clothed (no mesh) camo lighted bill ball cap, shown later.
dproberts.files.wordpress.com_2012_10_20121005_134856.jpg_87dfba03ebf9b6dd1c111cf275ffffa9.jpg
 

Droberts

Sharpshooter
Special Hen
Joined
Aug 26, 2010
Messages
422
Reaction score
0
Location
Edmond
For the pants, build just like you did the jacket. For this suit (archery build) I would likely be spending a lot of time crouched on my knees. The knee pads shown here are not stitched on, simply apply a large amount of Liquid Stitch to the pants, slap on your foam padding, apply some more glue & then the fabric covering. As a bit of artistic boredom I glued on some raffia bits to the front of them to see how it’d look. I expected it to be gone within the first days use but surprisingly most of it has held up after four outings.No matter what design you go with on the pants make sure you have a section around the ankle for ghillie material. It’s very important to hide your boots if you find a need to go prone.Not required but highly suggested – suspenders. Sew & glue a sturdy set of suspenders to your suit to achieve maximum comfort and ergonomics. It’s a pain in the butt to walk around in the woods with sagging pants.
dproberts.files.wordpress.com_2012_10_20121005_134843.jpg_87dfba03ebf9b6dd1c111cf275ffffa9.jpg


Now make your head cover. There are many ways – boonie hat, mesh, netting alone, hoodie, etc. My personal preference by FAR is the plain jane ball cap. I love having a bill to move the ghillie away from my eyes and to provide side curtains for my face. Unless I’m looking right at you my face is mostly obscured the entire time.It’s very easy to cut the netting for ball caps. Simply cut out 6 good sized pizza slices and sew them to the hat. Glue it up good & you’re set.
dproberts.files.wordpress.com_2012_10_20121005_134810.jpg_87dfba03ebf9b6dd1c111cf275ffffa9.jpg


This hat happens to be one of those hats that have the dual LED lights on the front, added bonus for those times when you need a light quick.
dproberts.files.wordpress.com_2012_10_20121005_134739.jpg_9fd46bc7ae30471f0a46e5ce2eae907e.jpg
dproberts.files.wordpress.com_2012_10_20121005_134757.jpg_9fd46bc7ae30471f0a46e5ce2eae907e.jpg


Tie on your strands, trim around the face & eyes as needed, toss on a little burlap & you’re good.When you put on your cover run your hands along the inside of the hanging ghillie and flare it out so that it rests slightly on your shoulders. This keeps it from from your neck line.
dproberts.files.wordpress.com_2012_10_20121005_134827.jpg_87dfba03ebf9b6dd1c111cf275ffffa9.jpg


Once in the field the gaps in the netting allow for live vegetation to be inserted. A face mask completes the camo covering for the head.
dproberts.files.wordpress.com_2012_10_20121004_103834.jpg_7d52d3682465204d63442cc3aba4bc63.jpg


Trimmed neckline for the hat.Getting poked in the ears and the back of the head constantly is very annoying.
dproberts.files.wordpress.com_2012_10_20121005_134948.jpg_7d52d3682465204d63442cc3aba4bc63.jpg


Archer Specific ghillie layout: Leave the bow arm bare on the inside as well as the portion of the chest that the string would be in conflict with. Even the smallest strand of raffia or burlap is enough to throw your shot a mile off as well as endanger yourself and your equipment. A simple strand of raffia or burlap left untrimmed in the wrong place could throw your string off your cams & ruin a really good day.Additionally, I leave a small elastic archers brace attached to my left sleeve to keep the jacket fabric out of the way at all times. (not pictured here) Once the brace is in place netting & additional ghillie can be applied to the back of the forearm if trimmed properly.
dproberts.files.wordpress.com_2012_10_20121005_135006.jpg_87dfba03ebf9b6dd1c111cf275ffffa9.jpg
 
Last edited:

Droberts

Sharpshooter
Special Hen
Joined
Aug 26, 2010
Messages
422
Reaction score
0
Location
Edmond
Brand new untrimmed & unconditioned archers guillie, pardon the messy room we’re still unpacking.
dproberts.files.wordpress.com_2012_10_20121005_134908.jpg_92b9bdf9f77bda07f3dc3ff313a55f1f.jpg


Conditioned front.
dproberts.files.wordpress.com_2012_10_20121015_081728.jpg_7d52d3682465204d63442cc3aba4bc63.jpg


Conditioned left.
dproberts.files.wordpress.com_2012_10_20121015_081839.jpg_7d52d3682465204d63442cc3aba4bc63.jpg


Conditioned back.
dproberts.files.wordpress.com_2012_10_20121015_081829.jpg_7d52d3682465204d63442cc3aba4bc63.jpg


Conditioned right. Conditioning is very important for a suit made of raffia. The suit is ready for use, but not completely broken in. Right now the only part of my suit that is conditioned to my complete satisfaction is the ankle portion. I’ll post another series of shots in a few months of the suits’ conditioning progress.
dproberts.files.wordpress.com_2012_10_20121015_081817.jpg_7d52d3682465204d63442cc3aba4bc63.jpg


This picture shows the effectiveness of the suit WITHOUT live vegetation tied in. With live vegetation taken from the plants pictured here it the effectiveness would be ten fold. Note the use of shadow placement.Even without live vegetation in the tie downs the texturing of the raffia gives the suit a very planty-like appearance.In this picture I am in my one knee down one knee up shooting position with head tucked down.
dproberts.files.wordpress.com_2012_10_20121015_082010.jpg_7d52d3682465204d63442cc3aba4bc63.jpg


Same as the previous picture, but zoomed in a bit so you can see me looking at the cameraman. I can see completely through with both eyes in that small space in the head area.
dproberts.files.wordpress.com_2012_10_20121015_081959.jpg_7d52d3682465204d63442cc3aba4bc63.jpg


One of the suits I use for paintball, this one is winter only using the same material as the archery suit.
dproberts.files.wordpress.com_2012_01_p2062001_wm.jpg_a89c26beabdd306420655336ddab1cff.jpg


Another well conditioned light ghillie. The raffia on this suit is 3-9 years old and has seen very heavy use.
dproberts.files.wordpress.com_2012_10_photo.jpg_7d52d3682465204d63442cc3aba4bc63.jpg
 

Droberts

Sharpshooter
Special Hen
Joined
Aug 26, 2010
Messages
422
Reaction score
0
Location
Edmond
How many hours and $$$ do you have in such a suit?

about an hour every day sewing for about 2 months, bout 1 week tying on the ghillie 2hrs a day, a few days archery practice while wearing it to get it perfectly trimmed, and about 20 hours walking through thick brush so far for conditioning. the conditioning step is just as important as anything else.

cost? um

hat 10$
mesh bout 30$
liquid stitch 5x6$=30$
jacket=60$
pants=60$
palm raffia=10x5$=50$
burlap=15$ with lots left over.
dye=5x3$=15$

so bout $270 and about 77hrs labor. but it'll last for.. judging from my oldest suit.. (8hrs x 3-4times a month) x 9years(12months) = 108 months( 24 to 32 hrs/month) = 2592 to 3888 hrs use with minimal upkeep & seasonal strand changes.
 

gmar

Sharpshooter
Supporting Member
Special Hen Supporter
Joined
Oct 5, 2009
Messages
3,661
Reaction score
763
Location
Piedmont
I've always wanted to make my own suit for the heck of it, thanks for the write up and photos!

Where did you buy the netting and bdu from?
 

Latest posts

Top Bottom