Mossberg bolt action question.

This site may earn a commission from merchant affiliate links, including eBay, Amazon, and others.

Pulp

Sharpshooter
Special Hen
Joined
Sep 17, 2010
Messages
2,086
Reaction score
780
Location
Valliant, OK
81039D60-4CA1-49A3-9642-4917D8D551DF.jpeg
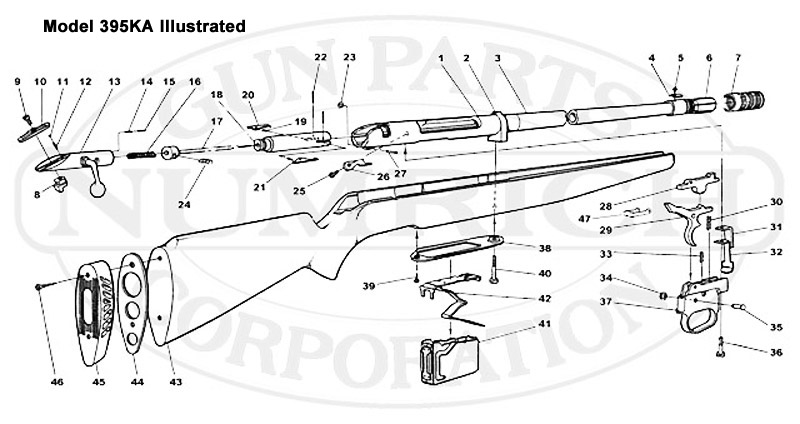
Anyone know how to dissemble this bolt. Shotgun was found in a storage shed all rusted up. I’ve gotten it cleaned up enough to test fire a blank 20 gauge shell, but still to work on this bolt.
5D8285C8-0CCD-4F9B-B49D-FB67ECE612C7.jpeg
 
Joined
Mar 17, 2009
Messages
2,742
Reaction score
2,845
Location
Wagoner
I've got a 395 in 12 ga, hands down my favorite. Got it from @Free Trapper years ago.
This less the 5 round mag.

22664250_2.jpg


It's been a while since I tore my bolt all the way down, but I'm fairly sure I grabbed the bolt body then rotated the bolt down like you would in to close the action. From there it starts to slide apart.
 

HFS

Sharpshooter
Special Hen
Joined
Sep 8, 2009
Messages
2,841
Reaction score
3,357
Location
Shangri-La
Could not find pictures online but found these instructions from J.B. Wood's book on takedown/disassembly of the Mossberg 395.
Here's the instructions for taking apart the bolt:

1. Remove the magazine. Open the bolt, hold the trigger pulled to the rear, and remove the bolt from the rear of the receiver.
2 . Use a tool to depress the bolt index plunger toward the rear, and turn the front section of the bolt clockwise (front view) about one-half turn.
3 . Remove the front section of the bolt toward the front.
4 . The extractors are retained on each side of the front section by vertical pins. The pins are driven out downward, and the extractors and their coil springs are taken off toward each side.
5 . The bolt index plunger and its spring are staked into the front of the rear section, and they are not removed in nonnal disassembly.
6 . With the striker still in the cocked position, pry the striker head slightly toward the rear, and insert a tool (one of Brownells Magna-Tip screwdriver blades was used here) to detain it and align the sear pin with the access hole on the right side of the rear section. Drive out the sear pin toward the left. The pin is splined internally for tight seating, and will require firm support for removal.
7 . Grip the firing pin shaft firmly with smooth-jawed pliers, move the firing pin/striker assembly slightly toward the rear, and withdraw the tool that has retained it during the removal of the pin. Proceed with caution, the striker spring is fully compressed. Release the tension slowly, and take out the firing pin/striker assembly and its spring toward the front.
8 . With the safety in either position, remove the screw at the center of the safety button.
9 . Remove the safety button upward, and take off the tiny safety detent ball, taking care that this small part isn’t lost. Remove the detent spring from its hole.
10 . Removal of the screw will also release the safety block on the underside, to be taken off downward.


Reassembly tips
1. When replacing the safety block, be sure the block is installed with the screw hole toward the front, and the lower extension toward the rear, as shown.
 

Latest posts

Top Bottom